


As the temperatures drop and the nights grow longer, families across the UK find themselves spending more time indoors.
This transition into the colder months offers a unique opportunity: turning indoor play and family time into insightful learning experiences.
With ClassTutor’s dedication to nurturing inquisitive minds, we’ve crafted a list of fun and educational DIY science experiments.
These experiments are tailored for children aged 4-16 and require minimal, easily accessible materials.
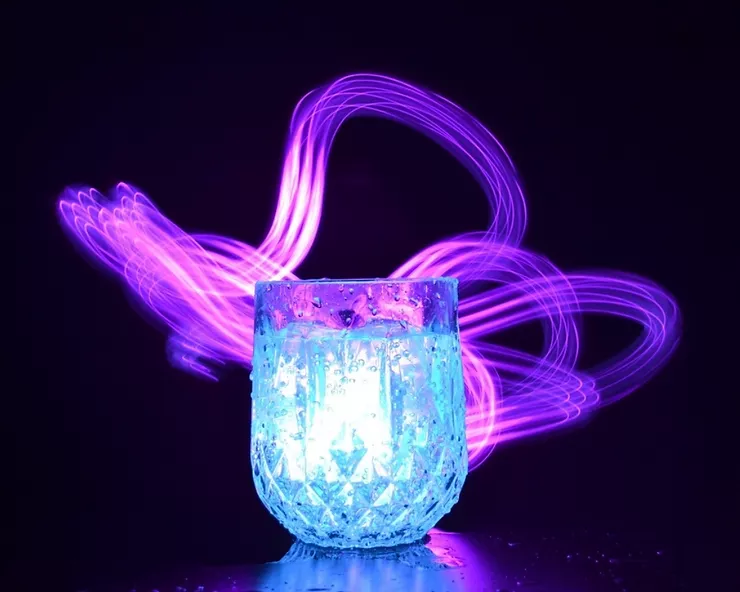
👻 Glowing Ghosts: A Mesmerising Luminous Treat
Materials Needed:
- Tonic water
- Clear plastic bottle or jar
- UV light
Activity Instructions:
Fill the clear plastic bottle or jar with tonic water and place it near the black light. Turn off all other lights and watch as your tonic water turns into a glowing ghostly liquid.
Behind the Magic:
Fluorescence is a phenomenon where certain substances absorb ultraviolet light and re-emit it as visible light. The quinine in tonic water absorbs the UV light from the black light, transforming it into the ghostly glow we can see. It’s a fun way to introduce kids to the concept of light wavelengths and the transformation of one type of light into another.
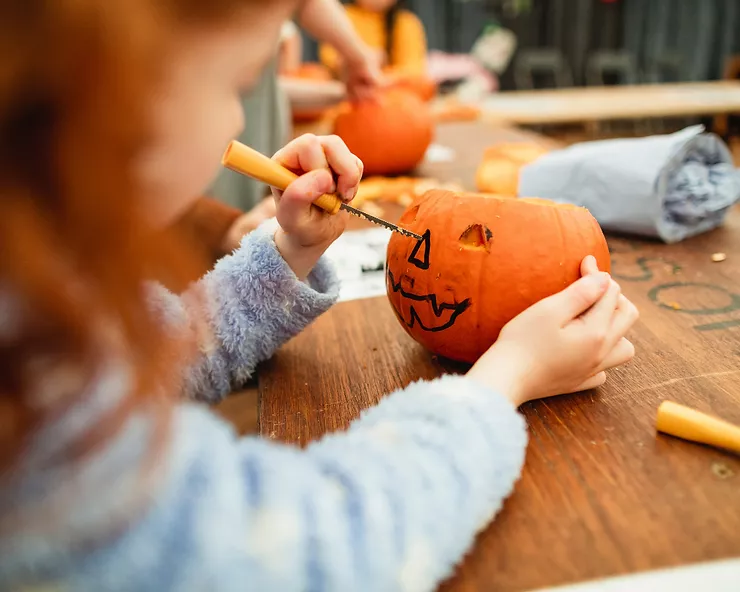
🎃 Pumpkin Volcano: Erupting Seasonal Fun
Materials Needed:
- A small pumpkin
- Baking soda
- Vinegar
- Food colouring (optional for colourful lava)
- Dish soap (optional for a foamy eruption)
Activity Instructions:
Carve out the top of the pumpkin and scoop out the seeds and pulp, similar to how you would when creating a jack-o’-lantern.
Fill the cavity about a third full with baking soda.
Add a few drops of food colouring if you want coloured “lava.”
Add a small squirt of dish soap to make the eruption foamy.
Slowly pour in vinegar and watch the pumpkin “erupt”!
Behind the Magic:
This is a classic acid-base reaction. The baking soda (base) reacts with the vinegar (acid) to produce carbon dioxide gas. This gas causes the bubbling and frothing that looks like a volcanic eruption. The pumpkin adds a fun, seasonal twist to the experiment and can introduce discussions about chemical reactions in a context children will find engaging and memorable.
💀 Dancing Skeletons: The Jig of the Fizz
Materials Needed:
- A clear glass or container
- White vinegar
- Baking soda
- Paper (cut in the shape of a skeleton or ghost)
Activity Instructions:
Pour white vinegar into the glass. Add a small amount of baking soda. Immediately drop in the paper skeleton or ghost and watch it dance in the fizz.
Behind the Magic:
The fizz results from a chemical reaction between baking soda (a base) and vinegar (an acid), producing carbon dioxide gas. The gas bubbles lift the paper, making it appear as though it’s dancing. This is a playful introduction to acid-base reactions and gas release in chemistry.
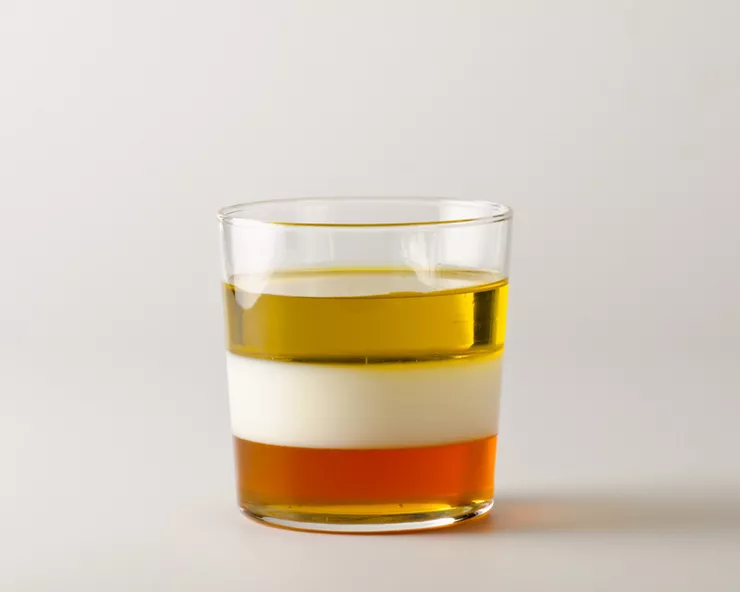
🍵 Witch’s Brew: A Potion of Density
Materials Needed:
- Clear glass or container
- Various liquids (honey, dish soap, water, oil)
Activity Instructions:
Carefully pour each liquid into the glass. Due to differences in density, they won’t mix, creating a layered effect.
Behind the Magic:
Each liquid’s molecular weight determines its density. The liquids remain separated in layers because of their varying densities, visually teaching kids about molecular weight and the properties of different substances.
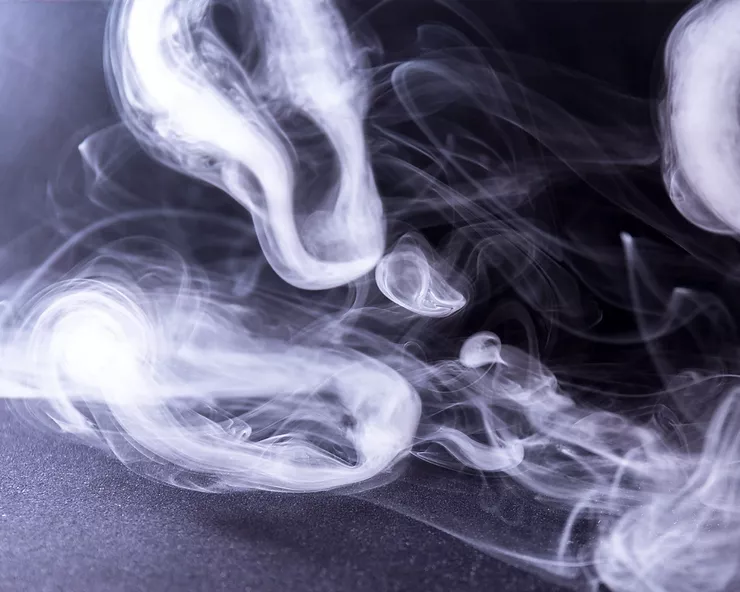
💨 Ghostly Smoke Rings: The Spectres of Air Pressure
Materials Needed:
- A plastic bottle with a cut-off end
- A balloon (cut in half)
- Incense or a smoke machine (optional)
Activity Instructions:
Secure the balloon over the cut end of the bottle, ensuring it’s taut. If you have incense or a smoke machine, fill the bottle with smoke. Tap the balloon end, and smoke rings will come out from the bottle’s neck.
Behind the Magic:
Tapping the balloon forces a stream of air (or smoke) to create a toroidal vortex. This experiment can introduce discussions about gas behaviour, fluid dynamics, and the principle of conservation of momentum in fluids.
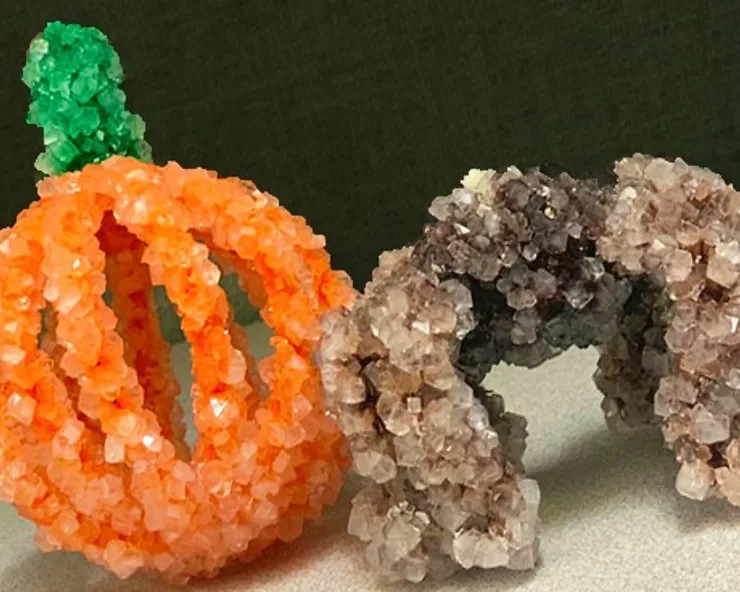
💎 Creepy Crystals: Grow Your Own ‘Monster’ Crystals
Materials Needed:
- Borax
- Pipe cleaners
- Boiling water
- A pencil
- String
- A clear container
Activity Instructions:
Shape the pipe cleaner into a monster or any fun shape. Attach a string to it and tie the other end to a pencil. Make a borax solution in boiling water, ensuring the borax is fully dissolved. Place the pipe cleaner shape into the container, ensuring it’s fully submerged but not touching the container’s sides. Place the container in a cool place and wait for a day or two to see your monster crystals grow.
Behind the Magic:
Crystallisation occurs when substances transition from liquid to solid, forming a structured, repeating pattern. The borax particles in the cooling solution come together on the pipe cleaner in this manner, teaching kids about geology, mineral formation, and states of matter.
These indoor activities provide not only entertainment but also valuable learning opportunities. They align perfectly with ClassTutor’s commitment to making education fun, engaging, and accessible for all.
As we embrace the colder months, let’s ensure our children continue to explore, learn, and grow in wondrous ways.

