Unleash the budding scientist within your child this summer! With common household items, transform your home into a personal science lab.
Here, we present ten hands-on, educational experiments that will keep your kids engaged and foster a love for science.
1. Pine Cone Weather Station:
Kickstart your science adventures with this simple experiment related to weather patterns. By observing a pine cone, your child can predict the UK’s varying humidity levels.
Materials: Pine cone, notebook, pen.
Procedure: Place the pine cone in an open space. Observe its scales every day – when they’re closed, it indicates higher humidity, and when they’re open, it indicates lower humidity. Document observations in the notebook to track changes in humidity levels.
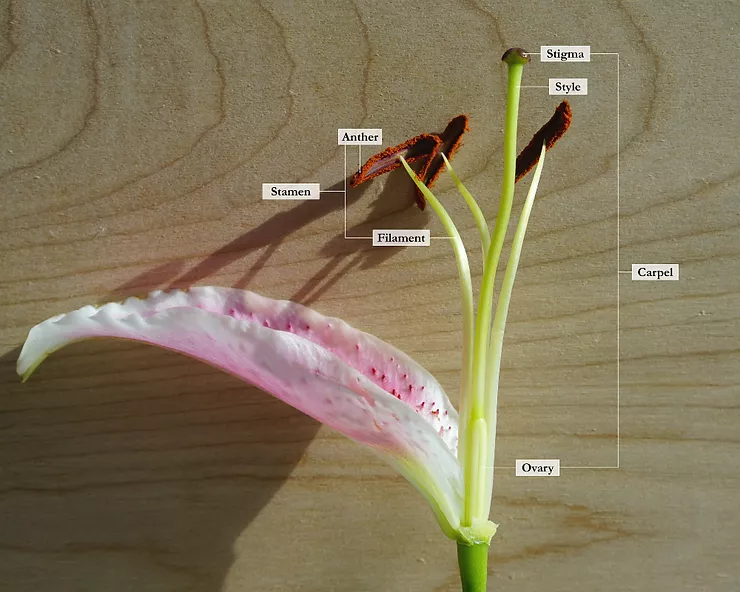
2. Flower Dissection:
Delve into the world of botany with a flower dissection. This colourful experiment helps children understand the parts of a flower and their functions.
Materials: A flower (preferably a lily or another large-petalled flower), tweezers, magnifying glass and paper.
Procedure: Gently remove each part of the flower and lay them out on the paper. Use the magnifying glass to observe structures like the stigma, stamen, and petals. Discuss the function of each part.
3. Potato Battery:
Explore the power of chemical reactions with a potato battery. By using a potato, copper coins, zinc-plated screws, and wires, your child can create their own source of electricity!
Materials: Potato, two copper coins, two zinc-plated screws, wires, LED bulb (optional).
Procedure: Insert a coin and a screw into opposite ends of the potato, ensuring they don’t touch. Attach wires to the coin and screw. Touch the other ends of the wires to the LED bulb’s legs – it should light up!
4. Homemade Volcano:
Demonstrate acid-base reactions in an exciting way with a homemade volcano. Use baking soda, vinegar, dish soap, and water to create a mini-volcanic eruption.
Materials: Small bottle, baking soda, vinegar, dish soap, food colouring (optional), tray.
Procedure: Place the bottle on a tray. Fill it with baking soda, a few drops of dish soap, and food colouring. Pour in the vinegar and watch the eruption!
5. Rainbow Milk Art:
Blend art and science in the rainbow milk experiment. Using milk, food colouring, and dish soap, your children can explore the principles of surface tension and create beautiful, swirling colour patterns.
Materials: Plate, milk, food colouring, dish soap, cotton swab.
Procedure: Pour milk onto a plate. Add drops of different food colouring. Dip the cotton swab in dish soap and touch it to the milk’s surface. Watch the colours swirl and dance!
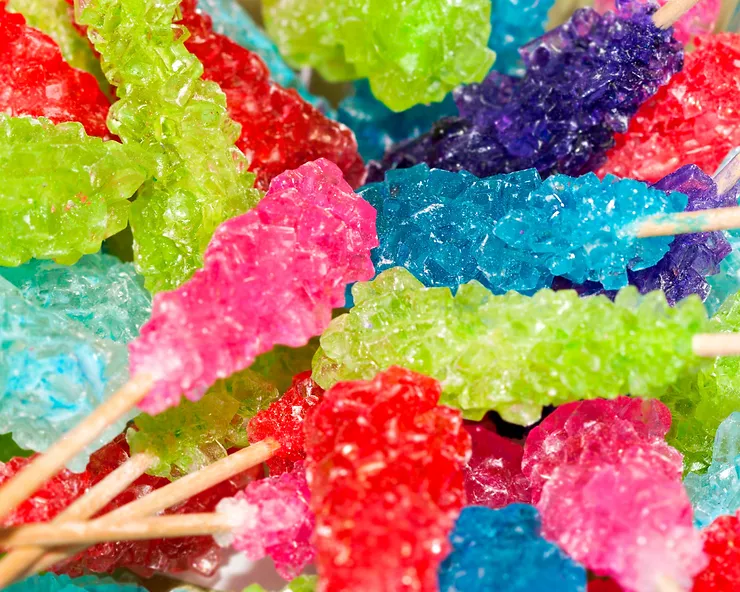
6. Edible Rock Candy:
Introduce your kids to the process of saturation and crystallization with a sweet treat – edible rock candy. Watch the formation of sugar crystals over a week and enjoy the delicious result!
Materials: Sugar, water, stick or string, clothespin, glass jar.
Procedure: Make a saturated sugar solution by heating water and dissolve as much sugar as possible. Pour into a jar, leaving some space at the top. Attach the stick/string to a clothespin and dangle it into the solution without touching the sides. Leave for about a week to see crystals form.
7. Simple Machines:
Make physics fun by building simple machines at home. Create levers and pulleys using household items and understand the concept of mechanical advantage.
Materials: Household items like rulers, string and spoons.
Procedure: Use a ruler as a lever by lifting objects with varying force. Create a pulley using string and a rolled-up paper tube to lift objects.
8. Crystal Garden:
Bring chemistry and art together by growing a crystal garden. This experiment uses salt, warm water, and cardboard to demonstrate the process of crystallisation.
Materials: Table salt, warm water, cardboard, container.
Procedure: Dissolve salt in warm water until no more can be absorbed. Place a piece of cardboard in the container and pour the solution over it. Leave for a few days to observe crystal growth.
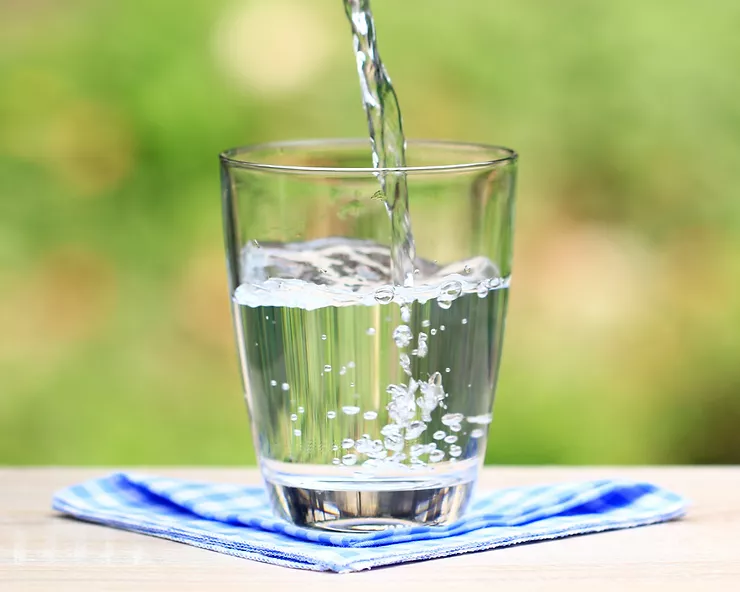
9. The Magic of Light:
Transform your living room into a spectacle of colours with a simple prism experiment. All you need is a glass of water and sunlight to create a beautiful spectrum of visible light.
Materials: Glass of water, sunlight, white paper.
Procedure: Position the glass of water in a sunny spot so that it casts a shadow. Place the white paper in the path of the refracted sunlight to observe the spectrum of visible light.
10. Make Your Own Barometer:
Conclude your scientific journey with a homemade barometer to understand atmospheric pressure. Watch how the simple device measures changes in atmospheric pressure with shifts in the UK’s weather.
Materials: Glass jar, balloon, rubber band, straw, index card.
Procedure: Cut the balloon’s neck and stretch it over the jar’s mouth. Secure with a rubber band. Attach the straw horizontally with the rubber band, ensuring one end is hanging over the edge of the jar. Place the index card behind the straw and mark daily straw movements to note pressure changes.
ClassTutor’s Online Summer Science Classes:
Complement your at-home science adventures with ClassTutor’s online summer science classes. Offering interactive lessons across various scientific disciplines, these courses promise a well-rounded and immersive learning experience.
Summer is the perfect time for exploration and learning. These interactive experiments, paired with ClassTutor’s online science classes, ensure that your child’s summer break is filled with fun, discovery, and knowledge enrichment. Learning science has never been more exciting!